
If you need to securely connect to your Mac desktop at home while on the move, Tailscale may be the answer. Here’s how to get started.
One of the main benefits of having a gigabit-class Internet connection is being able to connect to your home devices from outside the home. If you need a file from a home fileserver, you have tons of bandwidth so you know you can get it remotely, quickly.
However, while having the bandwidth is good, establishing the connection in the first place can be a problem.
In the old days, that used to simply mean setting up port forwarding on your router and connecting to a specific IP, or an address if you had set up a dynamic DNS service beforehand.
But with the rising use of Carrier-Grade NAT (CGNAT), this won’t work anymore. If you’re using an app like Jellyfin that lets you stream media outside the home, CGNAT will screw that up completely without something managing your connection.
Then there are the problems associated with firewall configuration, and many other small security and privacy-related things to consider. It quickly becomes a mountain of issues to mitigate.
What you ideally need is a way to connect your devices together that also handles most of the issues for you. Tailscale is one good answer.
What is Tailscale?
Tailscale describes itself as a “Zero Trust identity-based connectivity platform” that can replace a VPN, SASE, and PAM. That’s a lot of buzzwords in a sentence, but it is primarily pitched as an enterprise tool, not really a consumer app.
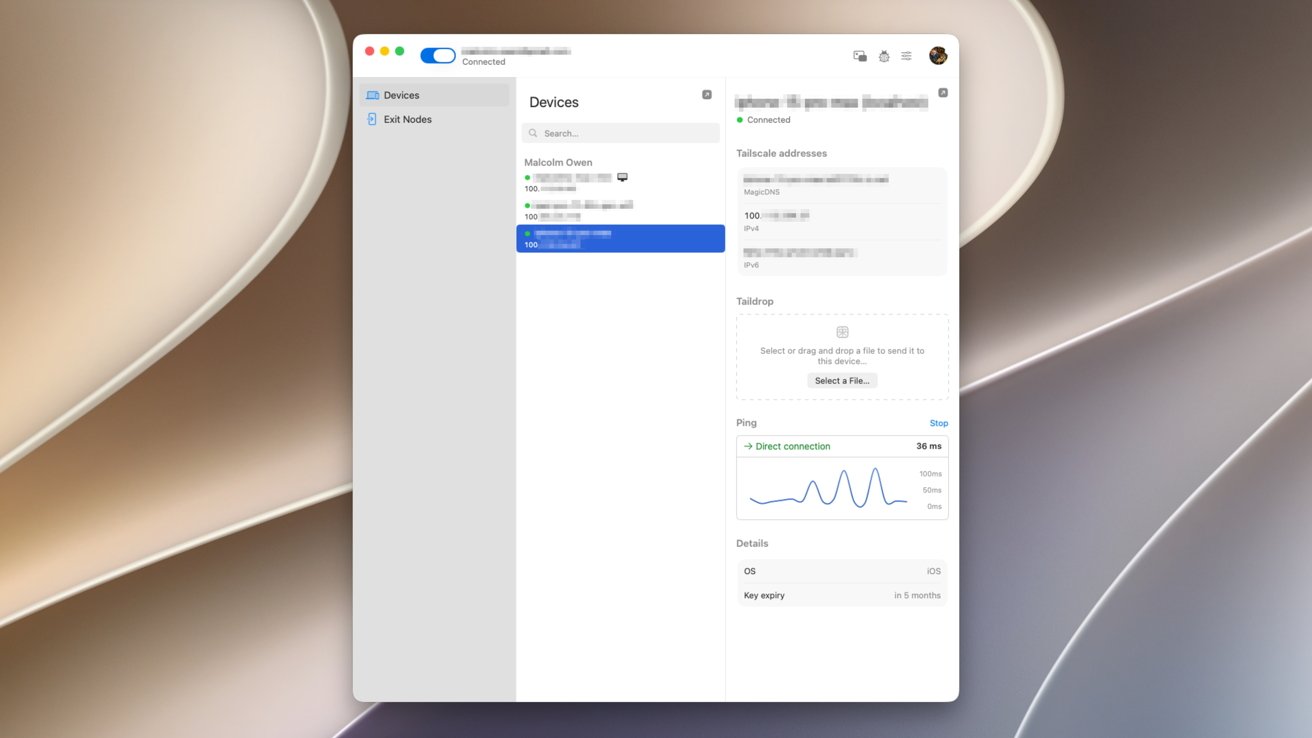
An example of a three-device setup in Tailscale’s macOS client.
It is a way to create a private mesh network between your devices, or more simply, so your devices can communicate directly with each other. Once set up, your iPhone could connect to your Mac over a cellular connection, or to a computer in a completely different country, all treated as if it’s on the same “local” network.
These connections are peer-to-peer and encrypted, protecting your privacy and your data in transit. As it’s an encrypted mesh network, the communications are also peer-to-peer, as direct as possible between your devices, without using an intermediary host server.
You’re not using a VPN server itself. Instead, it’s a direct connection between computers.
What can you do with Tailscale?
The whole point of Tailscale is to establish a network that’s somewhat similar to your home or office network between devices. Even if they’re not on the same physical network.
Tailscale refers to this as a Tailnet.
At a bare minimum, that means you can connect to a server while remote to access files, or to upload them. This is a fairly useful service for home users.

Tailscale’s web admin view. Devices on a Tailnet are listed, alongside 100-range iP addresses assigned to that hardware.
Since there’s file sharing, you could also use it for facilities such as remote access. You could control your at-home Mac while away from home, knowing full well it’s protected.
Both of these use cases also apply to business users, who could work from home as well as being out of the office on a trip.
You can also treat Tailscale like a hyper-personalized VPN service. You can designate a computer, like a home Mac, as an “exit node” that acts as a gateway to the Internet for devices on the Tailscale network.
That means you could be sat in a cafe on public Wi-Fi, connecting using Tailscale to your Mac to access the Internet via your home connection, all while encrypted.
How does Tailscale work?
Tailscale is all based on the idea of getting devices within a group to communicate with each other, even if there are obstacles in the way.
It all starts by having an account set up and clients installed on your devices. There are clients for macOS and iOS, as well as Windows, Linux, and Android.
The base of the platform is WireGuard, which creates encrypted tunnels between devices. This is normally between the user’s device and a VPN gateway or server, but in this case it’s between devices.
Rather than using a central hub server that all traffic is ferried through, the client devices connect to each other directly as a mesh network.
To actually set up the connections in the first place, as well as the encryption key exchange, the clients do connect to a central coordination server. However, that is only a minimal connection to establish communications, as the mesh network itself handles the data transfers.
The central communications server is also important as it is a place for the clients to contact that is a known quantity. With firewalls, CGNAT, and other things getting in the way, it’s to be assumed that the user doesn’t know what stands in the way of the connection itself.
Tailscale uses this as an opportunity to traverse the network obstacles between the clients, regardless of what connection they’re using. In some cases, it uses standards like STUN, ICE, and Designated Encrypted Relay for Packets (DERP) to keep things running.
How to get started with Tailscale
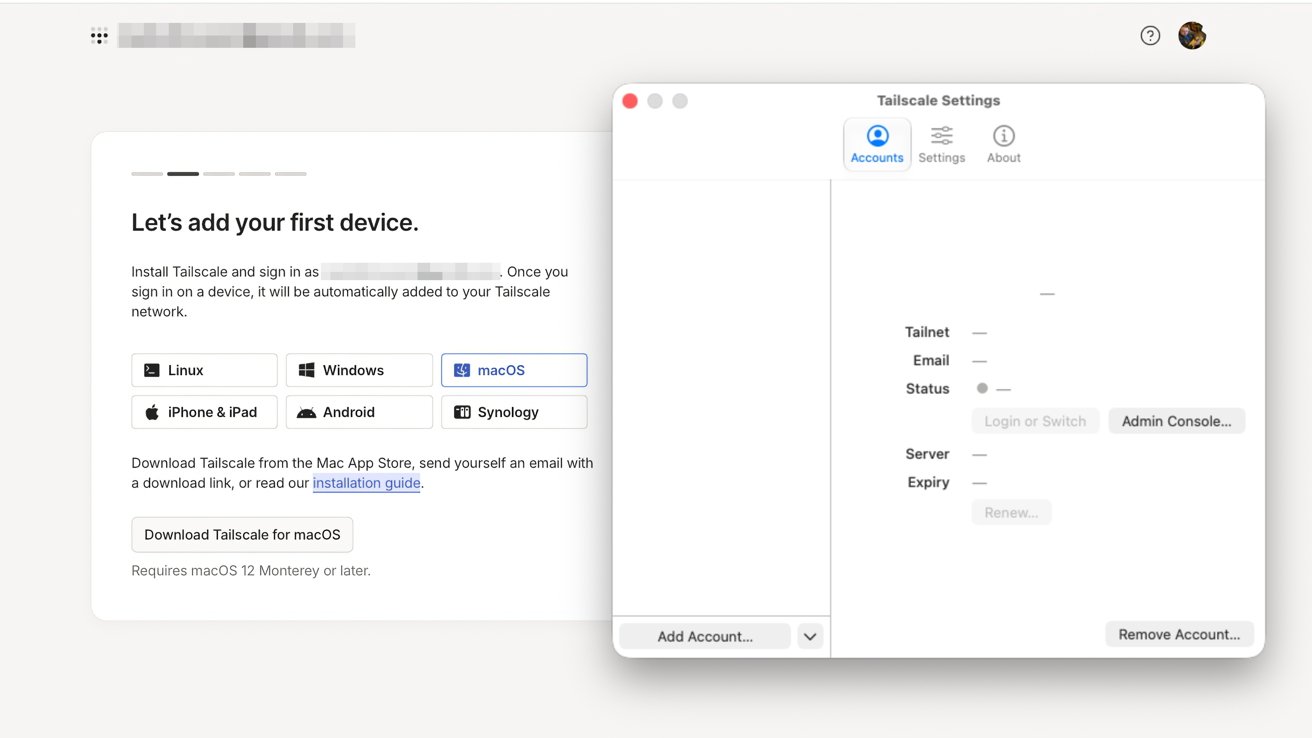
The first thing to do is to download and install the Tailscale client onto your devices. It is easiest to set up the account on a Mac, but install the iOS client on your iPhone too.
Go to the sign-up page, select Personal, and use one of the existing identity provider services. That is, use the links for Google, Microsoft, Apple, or GitHub.
You will need to set up under a public domain email account, for example, Gmail or iCloud.com, to be enrolled into the Personal plan automatically.
If you use a custom domain, you’ll be enrolled into the Enterprise plan for a 14-day trial. However you can also opt out of the trial and go onto the Personal plan anyway, through the service’s administration console.
The Personal plan, which is for individuals, is a free account for an unlimited number of devices and up to six users. For most home users, this is the one you will want to use.
The paid plans start from $8 per user per month for the Standard, rising to $18 for Premium, and custom pricing for enterprise customers. There are a number of paid add-ons you can also get, but most home users won’t need to touch these at all.
Adding the first device to Tailscale
The online signup will pause after authentication on a screen, requiring you to set up a first device. Open your Mac client and click Get Started.
You’ll be asked to allow VPN configuration. Click Allow VPN Configuration, then on the popup, click Allow to permit Tailscale to make changes.
In the Menu Bar, select Tailscale, then Settings. Click Add Account, which will open a browser for authentication via the same service as the initial registration.
When asked to Connect Device, click Connect. You’ll also be asked if you want to start on log-in, which you should agree to, or face starting it manually each time.
At that point, you will be informed that your device is set up for your Tailscale account, that you can find other network devices in the Menu Bar, and you can connect to them using specially designated IP addresses.
The browser will hint that you should set up and connect a second device. Do this now, using the appropriate app.
Tailscale on iPadOS
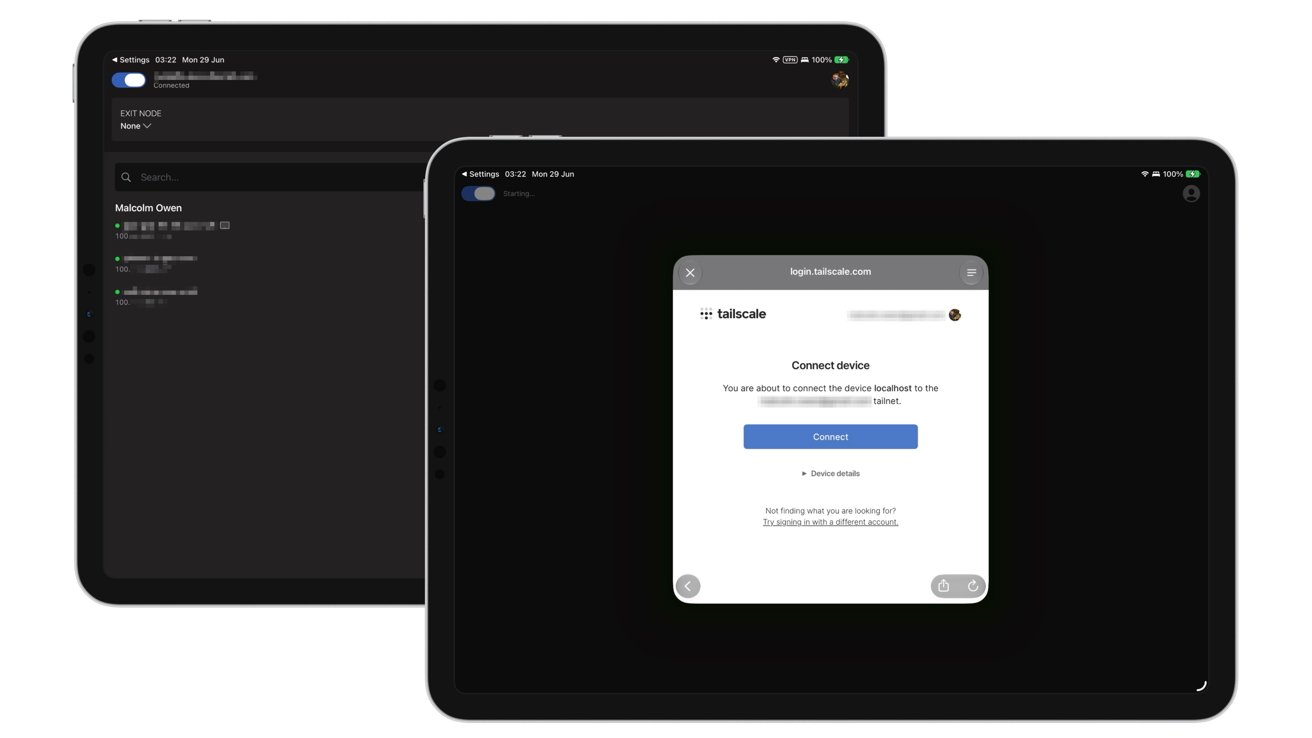
The authentication on iOS and iPadOS is relatively similar to macOS, in that you’re asked to configure VPN settings and notifications. After that, you sign in with your authentication details once more.
In the browser, you’ll be asked to test the connection between devices. Copy the ping command and paste it into Terminal, and ensure there’s no packet loss.
Click “Success, it works!”
At this point, you will have two or more devices connected using Tailscale’s Tailnet and communicating with each other.
Tailscale basics
Once you have established your Tailnet, you can immediately do a few things.
For a start, open the Tailscale app to see your account-connected devices, designated Tailnet IP addresses, and other essential information.
You can also get some of this information from the Menu Bar in macOS.
The apps include a function known as Taildrop, which you can think of as AirDrop but just for your Tailnet. You can select a file to send to another device, and it will transfer over automatically.
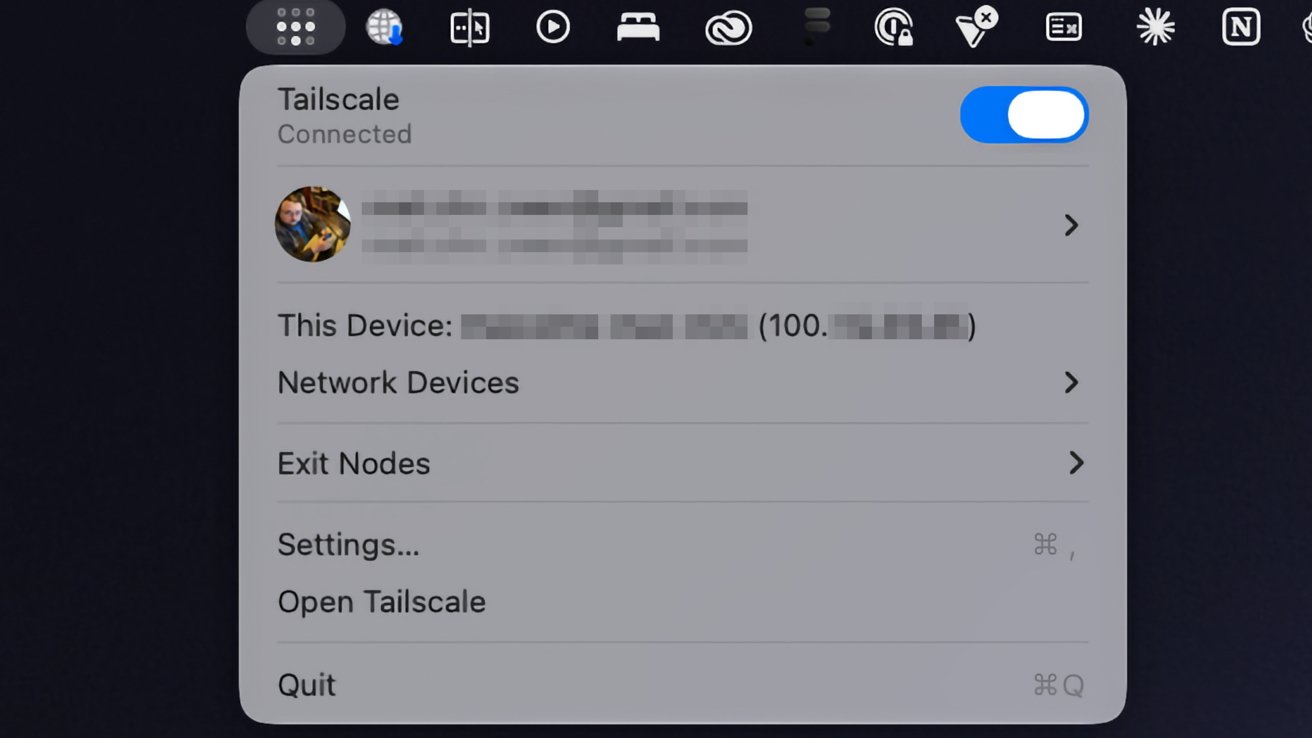
Tailscale’s presence in the macOS Menu Bar.
Since you also have access to IP addresses, you can also use them in network applications to connect to other devices on the Tailnet.
For example, you can use the Files app on an iPhone and use the Connect to Server with that IP address to access shared files on your Mac.
Another thing you can do is set your Mac as an Exit Node, which can funnel the Internet connections of other Tailnet devices through it like a private VPN.
On the Tailscale app on the Mac, select Exit Nodes to view any already set up on the network. If none are available, click the Settings icon then, under Exit Nodes, check Run as exit node then Ok on the warning box.
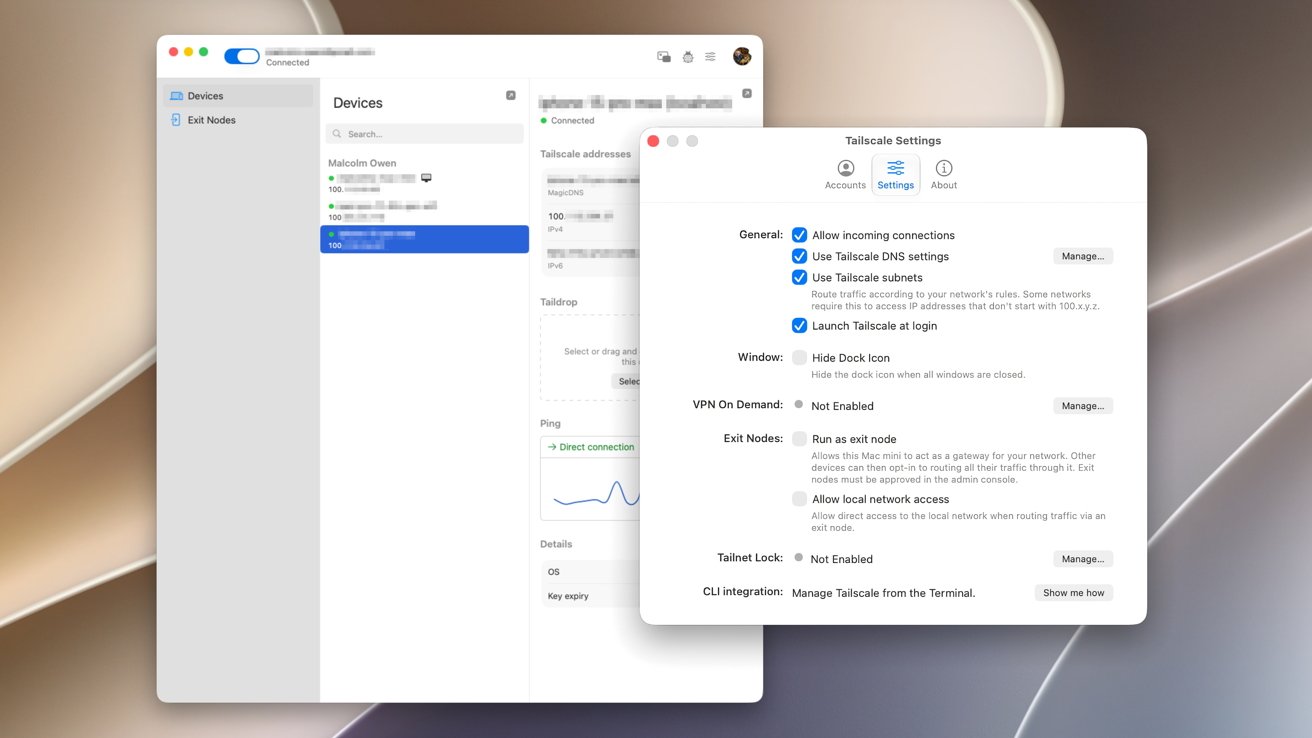
Tailscale macOS client settings include options to launch at login and to set the Mac as an Exit Node.
Go to the Admin Console, which opens in a browser window. Select the Mac, which also has the blue Exit Node status icon. Under Routing Settings, click Edit under Exit Node Awaiting approval.
Add the checkmark to Use as exit node and click Save.
In the Tailscale app on another device, select Exit Node. In the options, select your Mac to immediately reroute your traffic.
To stop the connection, tap Disable.
This is a very simple overview of using Tailscale as a personal user. But, it’s something that has a considerable number of features, if you’re prepared to dig deeper.
It is an enterprise tool at heart, after all.
The vast majority of these extra tools are handled in the admin console, in the browser. This includes setting up and managing users and changing settings for individual devices, at the more basic end of things.
However, you can go down the route of setting up DNS settings, network services, access to third-party SaaS apps, and connecting to cloud providers. Access controls and logs will also help you manage your virtual network here, too.
For AI researchers, Tailscale has Aperture in beta, which is a reverse proxy going between LLM clients and providers like OpenAI and Anthropic. It can be used to automatically ferry the right requests through to the right service, which could result in more accurate or suitable responses or reduced spending.
There’s a lot more beyond the scope of this article that an advanced user can go into. While most won’t necessarily care about these more technical aspects of Tailscale, it’s nice to know that there are options to tweak it to fit your exact networking needs.

