
With Private Networking for Amazon MQ for RabbitMQ, your brokers can establish outbound connections to private resources in your VPC without exposing those resources publicly. This post explains how the feature works and walks you through setting it up.
Amazon MQ for RabbitMQ brokers could previously only reach external destinations over the public internet. If you used a private Lightweight Directory Access Protocol (LDAP) server for broker authentication, you had to expose that server publicly. If you wanted to federate messages between private brokers, you needed workarounds like Network Load Balancers with IP allowlisting, as described in Implementing Federation on Amazon MQ for RabbitMQ Private Brokers. Private Networking removes those constraints.
You can connect your broker to private identity providers, other Amazon MQ for RabbitMQ brokers, or self-hosted RabbitMQ brokers running in private subnets. Combined with cross-Region networking services like AWS Transit Gateway, you can extend these connections across AWS Regions and accounts, with traffic staying on the AWS private network.
How it works
Private Networking connects your broker to private destinations using three AWS services: Amazon VPC Lattice, AWS Resource Access Manager (AWS RAM), and AWS PrivateLink.
You create a VPC Lattice resource gateway in a VPC that can reach your private destination. You then create a VPC Lattice resource configuration that defines the destination, such as an IP address or Domain Name System (DNS) name. You add the resource configuration to a RAM resource share and associate the resource share with your broker through the UpdateBroker API operation. After rebooting the broker, the network path is active and your broker can reach the private destination.
The broker does not need to be private. A publicly accessible broker works the same way.
What you can connect to
Private Networking supports three use cases.
Private identity providers
If you use an LDAP server or other identity provider for RabbitMQ authentication, you no longer need to expose it publicly. Create a resource configuration pointing to your identity provider, associate it with your broker, and use the DNS name returned by the DescribeSharedResources API operation in place of the public endpoint. Follow the existing guidance for setting up an identity provider, substituting the private DNS name.
Self-hosted RabbitMQ brokers
You can use Shovel or Federation to connect your Amazon MQ for RabbitMQ broker to a self-hosted RabbitMQ broker running in a private subnet. Create a resource configuration pointing to the self-hosted broker and use the DNS name from the DescribeSharedResources API operation in your Shovel or Federation configuration.
This pattern is useful for hybrid cloud architectures where you run RabbitMQ on Amazon Elastic Compute Cloud (Amazon EC2), Amazon Elastic Kubernetes Service (Amazon EKS), or on-premises infrastructure and want to exchange messages with Amazon MQ without exposing either side publicly.
Other Amazon MQ for RabbitMQ brokers
You can federate or shovel messages between two Amazon MQ for RabbitMQ brokers using Private Networking. Create a resource configuration pointing to the destination broker’s endpoint and specify that same endpoint as the custom domain name on the resource configuration. This helps to verify that the DNS name resolves correctly and Transport Layer Security (TLS) peer verification succeeds.
This extends to brokers in different AWS Regions and different AWS accounts. By combining Private Networking with cross-Region networking services like AWS Transit Gateway or VPC peering, you can build a fully private federation or shovel path between brokers, with no public endpoints required.
DNS names and custom domains
Each resource configuration can include a custom domain name. If you add a verified domain, that domain resolves to the private destination. If you do not add a verified domain, Amazon MQ provides a DNS name for the broker’s private connection. Retrieve this DNS name with the DescribeSharedResources API operation.
If you specify an unverified domain on a resource configuration, it is ignored. The broker’s private connection receives a private DNS name instead, which you can retrieve with the DescribeSharedResources API operation.
For more details on custom domain names and domain verification with VPC Lattice, see Custom domain names for VPC Lattice resources.
TLS peer verification in RabbitMQ 4
Note: If you are running RabbitMQ 4, review this section before configuring Shovel or Federation connections.
RabbitMQ 4 enforces TLS certificate peer verification by default for Shovel and Federation connections. RabbitMQ 3 does not enforce this by default. When using Private Networking, the DNS name that Amazon MQ assigns to the private connection will not match the TLS certificate of the destination, which causes peer verification to fail.
The recommended approach is to specify the destination broker’s endpoint (for example, b-a1b2c3d4-5678-90ab-cdef-EXAMPLE11111.mq.us-east-1.on.aws) as the custom domain name on the resource configuration. This exception only applies to Amazon MQ for RabbitMQ broker endpoints. You cannot use an unverified domain for self-hosted brokers. Specifying the Amazon MQ endpoint causes the DNS name to match the destination’s TLS certificate, and peer verification succeeds. This approach works regardless of your RabbitMQ version and avoids the issue entirely.
Getting started
To get started with Private Networking for Amazon MQ for RabbitMQ, follow these steps.
Prerequisites
Before you begin, verify you have the following:
- An AWS account.
- The AWS Command Line Interface (AWS CLI) installed and configured.
- AWS Identity and Access Management (IAM) permissions to manage Amazon MQ, VPC Lattice, and AWS RAM resources.
- An existing VPC with connectivity to your private destination.
Walkthrough
After you have the prerequisites, follow these steps:
- Create an Amazon MQ for RabbitMQ broker if you do not already have one.
- Create a VPC Lattice resource gateway in a VPC that can reach your private destination. Make sure the resource gateway’s security group allows outbound traffic to your destination on the required port (for example, port 5671 for AMQPS (AMQP over TLS) or port 636 for LDAPS (LDAP over TLS)). The resource gateway must share at least one Availability Zone with the broker. Cluster brokers cover multiple Availability Zones, so this is satisfied. For single-instance brokers, verify the Availability Zone overlap.
- Create a VPC Lattice resource configuration pointing to your private destination (IP address or DNS name). If you’re connecting to another Amazon MQ broker, specify the destination broker’s endpoint as the custom domain name on the resource configuration, as shown in the following figure.
 Figure 1: VPC Lattice resource configuration showing the custom domain name field and resource definition populated with the Amazon MQ broker endpoint.
 - Add the resource configuration to a RAM resource share. The resource share must allow external principals, as shown in the following figure.Figure 2: RAM resource share configuration with the Allow external principals option selected.
- Associate the resource share with your broker by editing the broker and adding the resource share. You can also do this using the
update-brokercommand with the AWS CLI. You must pass the entire list of resource share ARNs you want on the broker. This is a put operation, not an add or remove operation.The associated RAM resource share appears as shown in the following figure.
Figure 3: Network settings view with associated RAM resource shares.
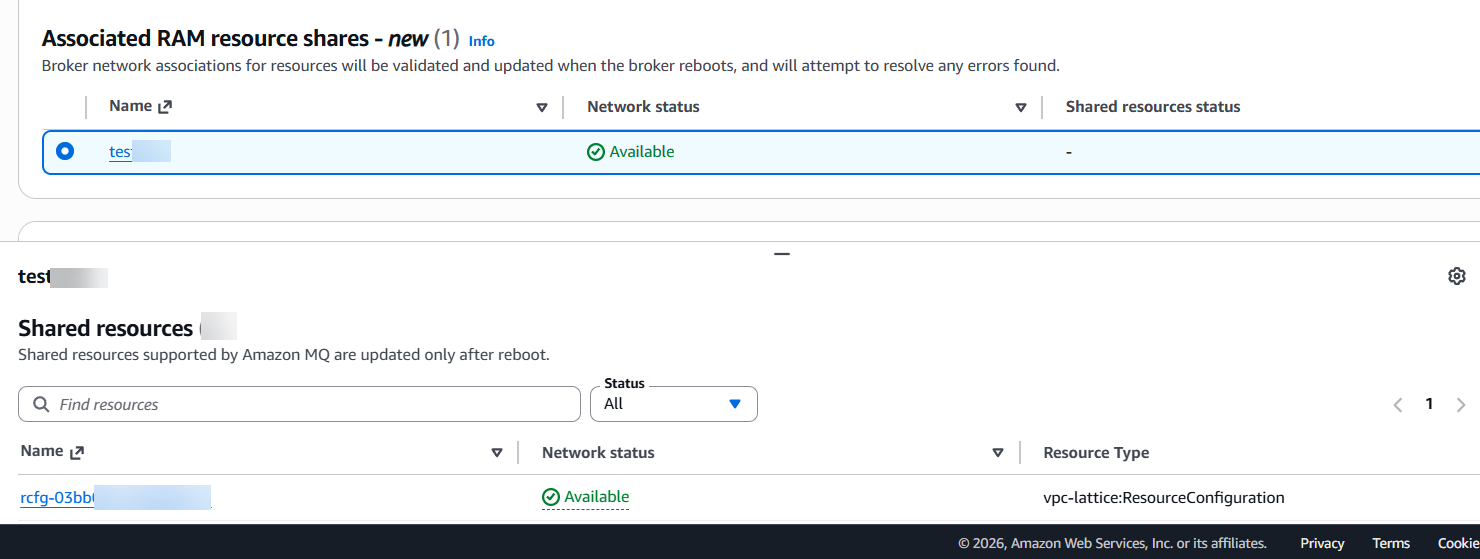
Select the resource share in the Associated RAM resource shares section. The network status of each shared resource is displayed in the Shared resources section, as shown in the following figure.
Figure 4: RAM resource share selection showing the network status of each shared resource.
- Reboot the broker from the AWS Management Console or the AWS CLI to create the network path:
- Retrieve the DNS names for your RabbitMQ configuration. This operation also surfaces issues encountered during setup:
- Use the DNS name returned in the output in your Shovel, Federation, or identity provider configuration. Adding new resource configurations to an existing RAM resource share does not automatically update the broker. You must call
update-brokerand reboot the broker for the new resource configurations to take effect.
 Figure 1: VPC Lattice resource configuration showing the custom domain name field and resource definition populated with the Amazon MQ broker endpoint.
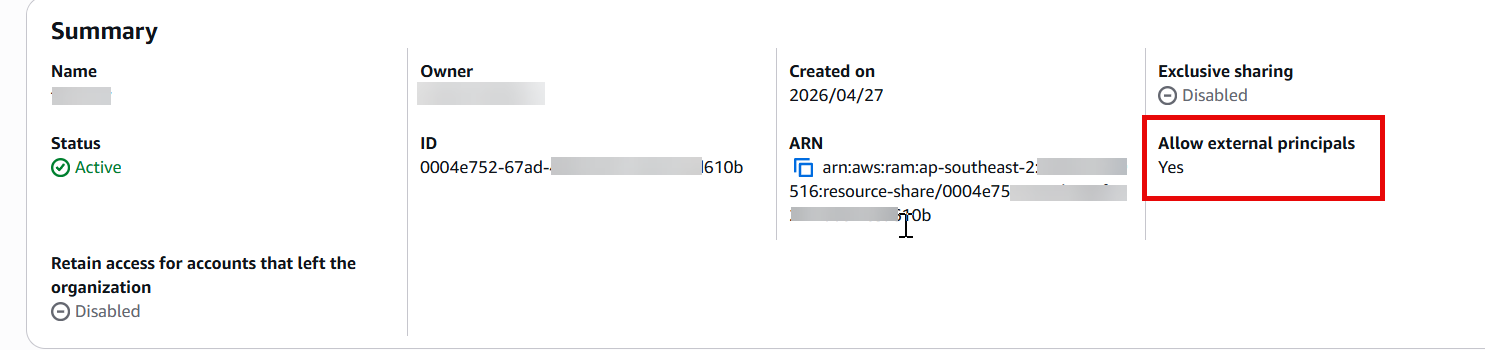 Figure 2: RAM resource share configuration with the Allow external principals option selected.
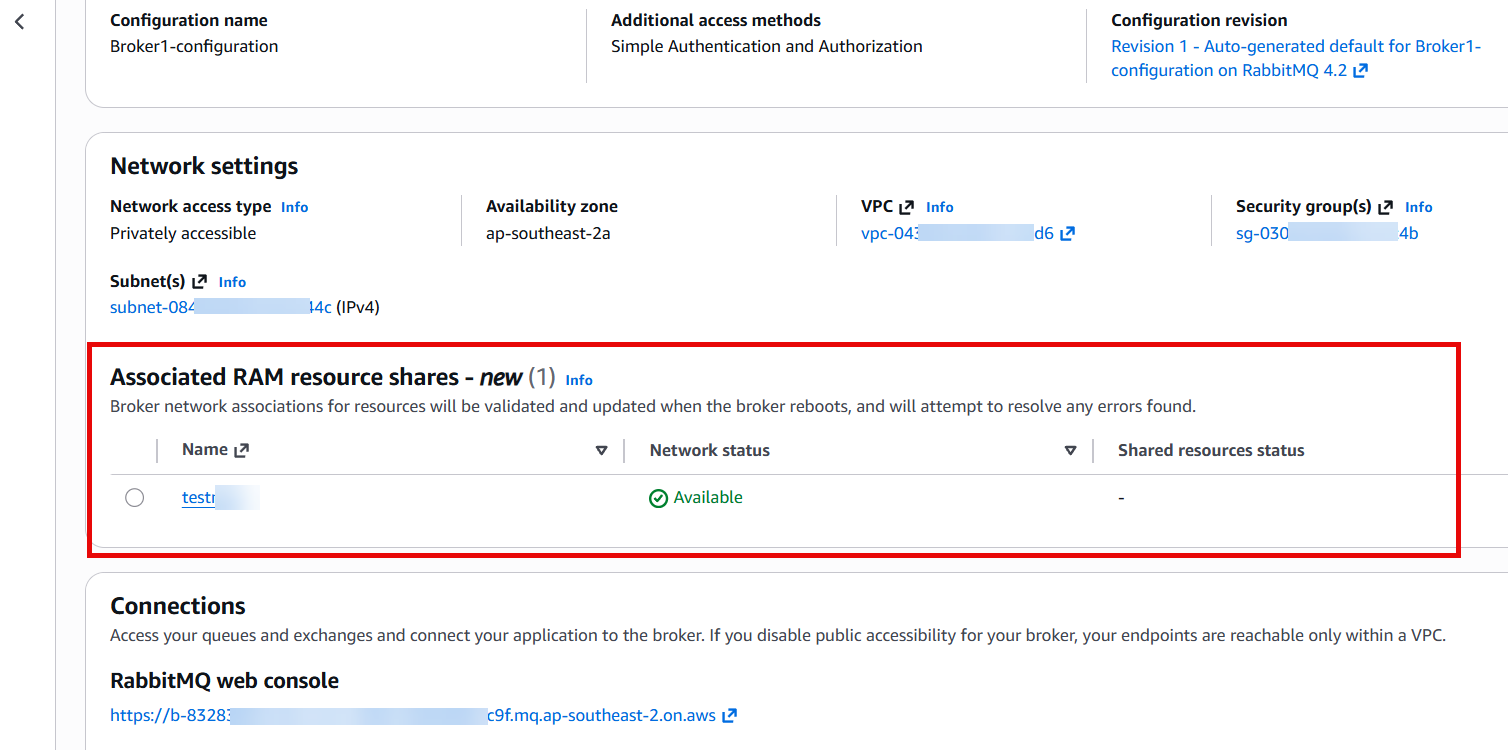
Cleaning up
Private Networking uses VPC Lattice and PrivateLink resources that incur ongoing charges. If you no longer need the private connection:
- Call
update-brokerwith the resource share removed from the list (or an empty list to remove all), then reboot the broker. - After the broker reboot completes and the resources are no longer in use, delete the VPC Lattice resource configuration and resource gateway.
- Optionally, remove the Amazon MQ account principal from the RAM resource share. This principal may still be in use if other brokers are associated with the same resource share, so only remove it if no other brokers depend on it.
- If you created a new Amazon MQ for RabbitMQ broker for this walkthrough and no longer need it, delete the broker from the Amazon MQ console or with the
delete-brokercommand.
Operational behavior: Resource access and reboots
Removing a VPC Lattice resource configuration from a RAM resource share while the broker is actively using it revokes access immediately, with no reboot required. Removing a principal from a RAM resource share has the same effect: brokers associated through that principal lose access to the resources in the share immediately. These are intentional security behaviors managed by RAM and VPC Lattice.
Adding new resource configurations to an existing resource share does not take effect automatically. You must call update-broker and reboot the broker for the new resource configurations to take effect. This is by design. It helps verify that changes to a resource share only reach the broker when someone with broker management permissions explicitly triggers the update, providing clear security separation between share management and broker management.
Private Networking is available for Amazon MQ for RabbitMQ brokers in all the AWS Regions where Amazon VPC Lattice is available. Amazon MQ for ActiveMQ brokers do not support this feature.
Pricing
Private Networking uses Amazon VPC Lattice and AWS PrivateLink. Data processing and data transfer charges apply to traffic sent through the private connection. There is an Amazon MQ pricing of $0.01 per GB of data processed through the resource endpoint. For details, see the Amazon MQ pricing page, VPC Lattice pricing page and AWS PrivateLink pricing page.
Conclusion
In this post, we explained how Private Networking for Amazon MQ for RabbitMQ works and walked through the setup process. Whether you’re securing a private identity provider, federating messages between brokers, or connecting to self-hosted RabbitMQ, your broker can now reach private destinations without exposing them publicly.
To learn more, see the Amazon MQ Private Networking documentation.
If you have questions or feedback, leave a comment on this post.
About the authors

