The DJI Neo 2 is one of the most interesting drones DJI has released in years — not because it’s the most powerful, but because it tries to be everything at once: a selfie drone, a traditional camera drone, and an FPV drone. After spending time flying it, I wanted to answer two questions:


- Is the DJI Neo 2 actually a good FPV drone?
- And more importantly — is it a good way for beginners to get into FPV flying?
Where to Buy
Get the Neo 2 from
What the DJI Neo 2 Actually Is
Before getting into the technical aspects, it’s important to understand what DJI is trying to achieve with the Neo 2.
The Neo 2 is primarily a selfie drone, and a surprisingly capable one at that. Compared to the original Neo, this feels like a completely different product.
For only $230, you get a lot of features, some of which are not even possible on more expensive custom built FPV drones:
- A 1/2-inch camera sensor
- 2-axis mechanical camera gimbal
- Front lidar sensor + 360° obstacle sensing
- Around 20 minutes flight time
- Improved, quieter propellers
- Built-in front display for quick controls
- Under the 250g weight limit
The biggest upgrade for me is the camera – it’s finally usable. Footage looks good enough for social media content — something I couldn’t confidently say about the first generation Neo.
However, this is not a pure FPV drone trying to compete with Avata 2 or custom-built freestyle drones. It’s a multi-purpose drone that happens to support FPV.
Design and Build
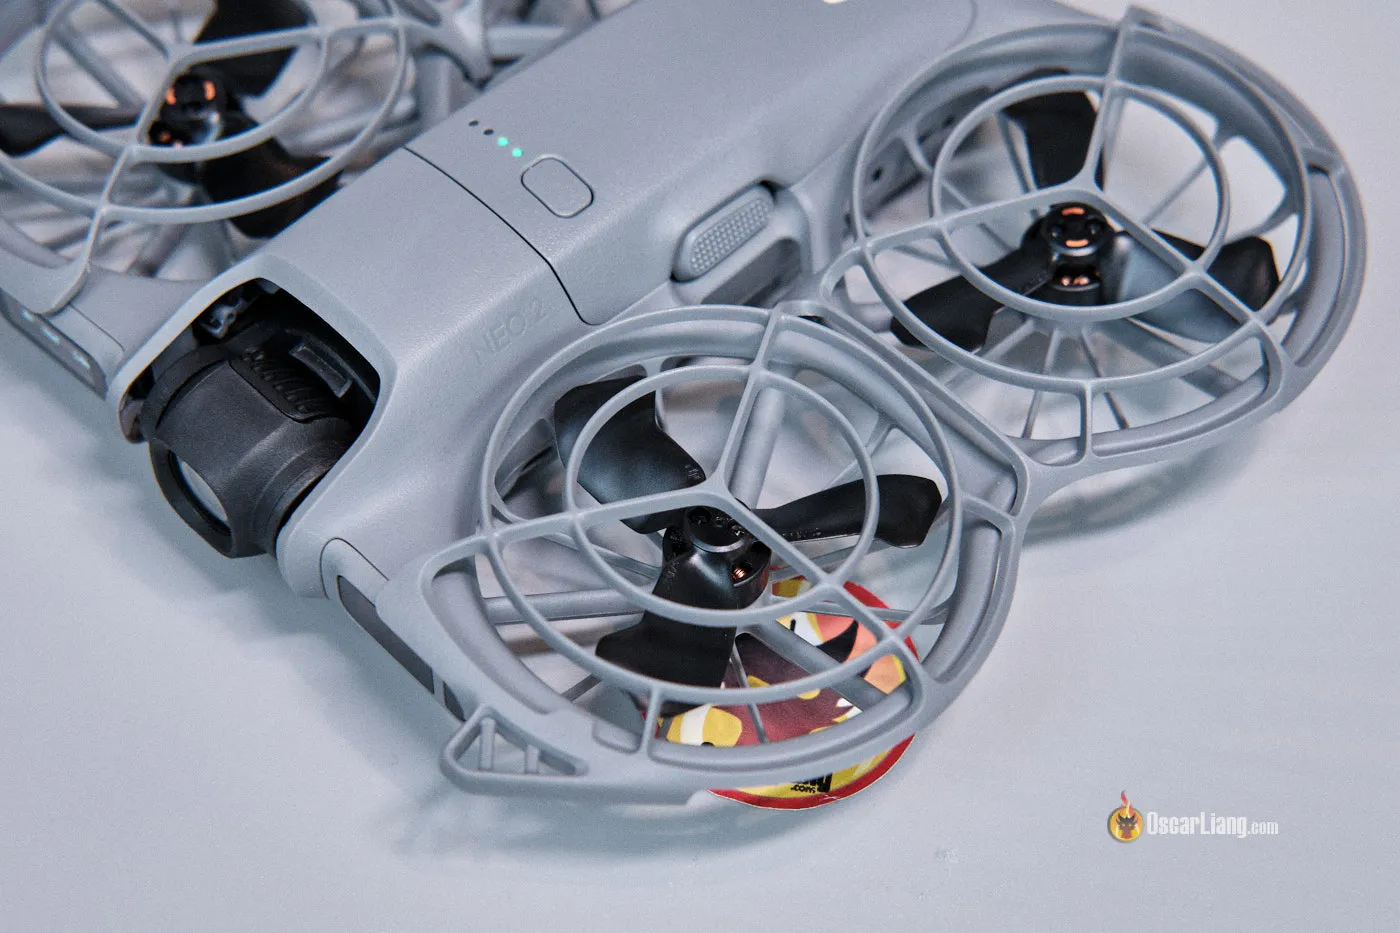
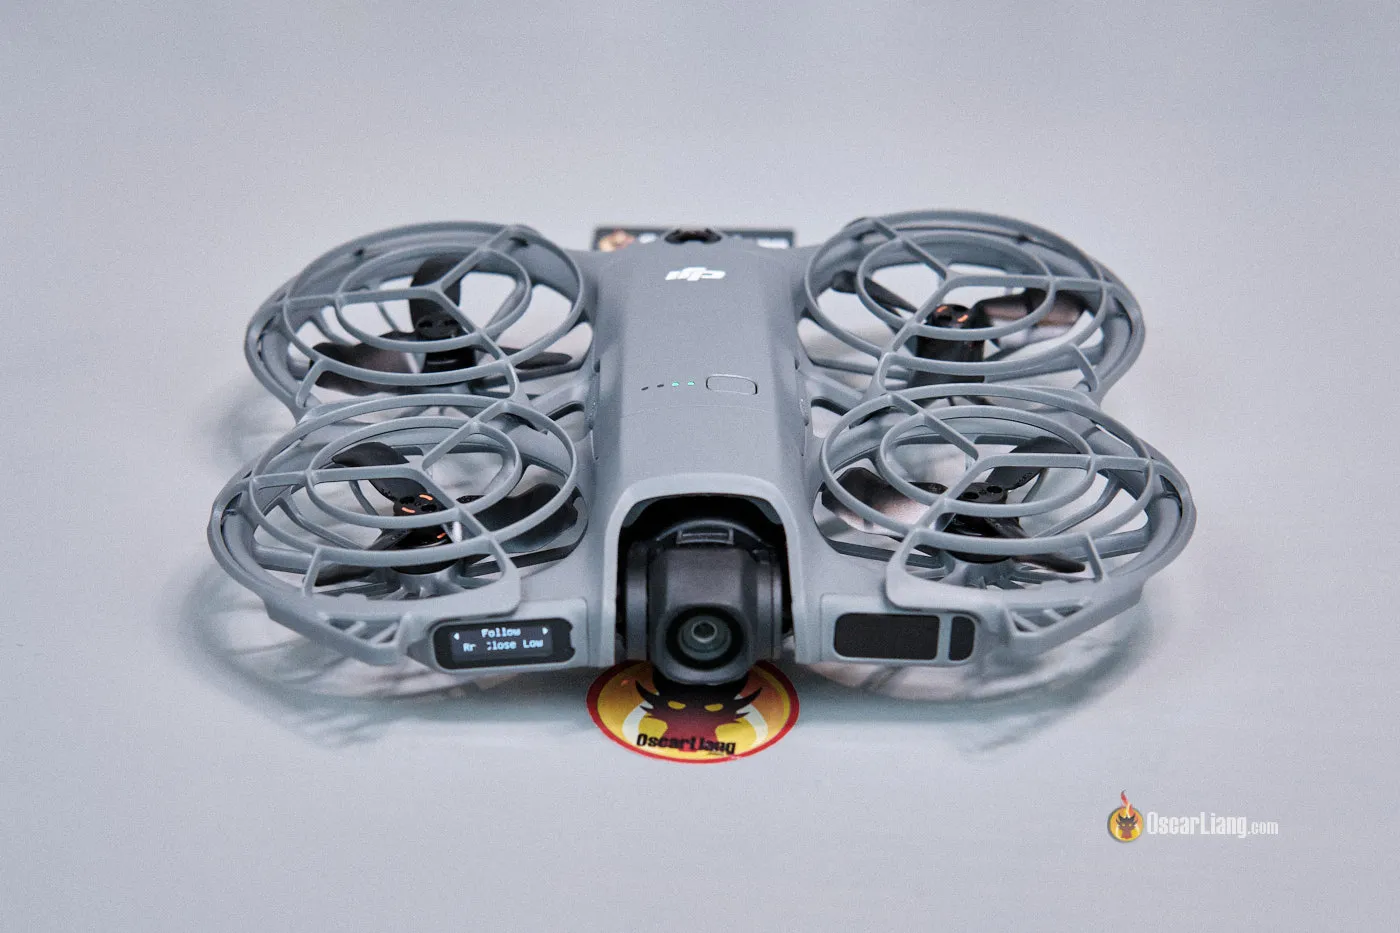
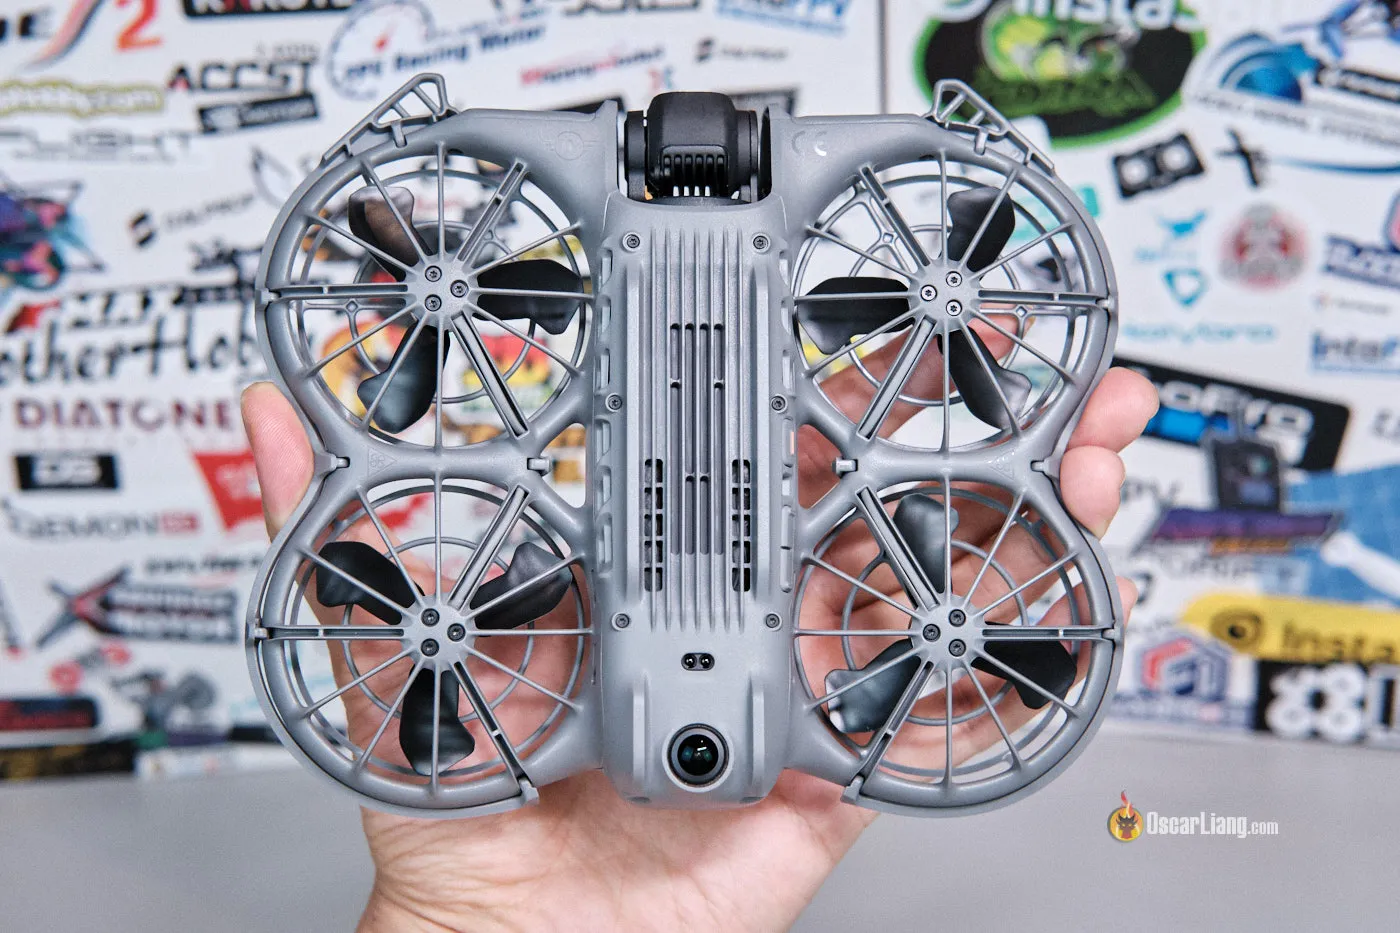
The Neo 2 features a one-piece plastic frame with propeller guards integrated directly into the structure. Because of this design, the drone cannot be folded. However, at roughly 150 × 170 mm, it remains small enough to fit easily into a bag or backpack.
The Neo 2 is only a few centimeters larger than the original Neo, but this extra size allows it to use slightly larger propellers. These provide better efficiency and improved stability in the air — especially helpful in windy conditions.
Specifications
Specs comparison table: Neo V1 vs Neo V2
| Neo V2 | Neo V1 | |
| Camera Sensor | 1/2″ CMOS | 1/2″ CMOS |
| Video | 4K/60fps | 4K/30fps |
| Gimbal | 2-axis | 1-axis |
| Stabilization | RockSteady | RockSteady |
| Onboard Storage | 49GB | 22GB |
| Battery Capacity | 11.5Wh (1600mAh) | 10.5Wh (1435mAh) |
| Flight Time | 19 minutes | 17 minutes |
| Charging | USB-C | USB-C |
| Top Speed | 16m/s max | 16m/s max |
| Advertised Range | 10km (O4 transmission) | 10km |
| Weight |
|
135g |
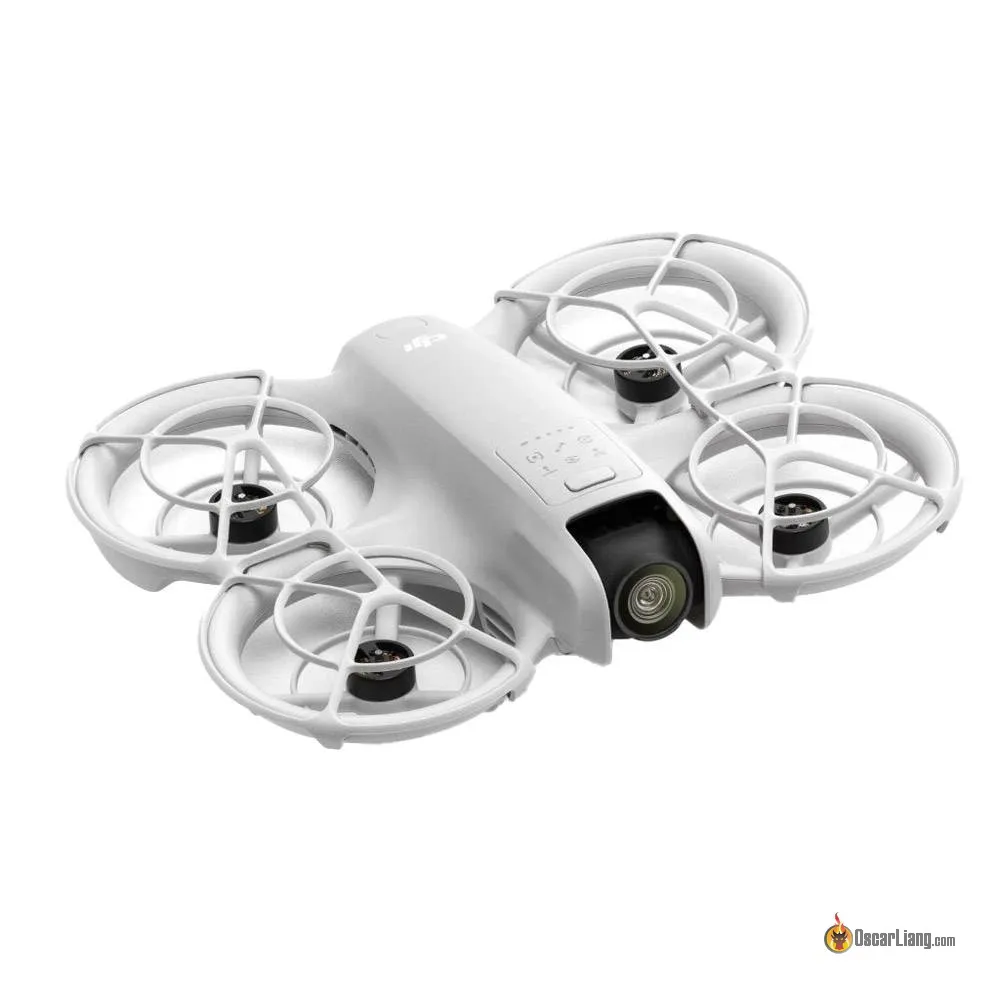
DJI Neo V1
DJI Neo V2
Three Ways to Fly the DJI Neo 2
One of the Neo 2’s biggest strengths is flexibility. You can fly it in 3 completely different ways.
1. Selfie Drone Mode (The Star Feature)
This is going to be the most popular mode. Simple to use, no controller required.
You can launch and control it using:
- Gesture controls
- Automated tracking
- Quick on-drone interface selections
The addition of 360° obstacle avoidance completely changes the experience. Earlier selfie drones required constant awareness to avoid crashes — this one actively prevents them.
It slows down automatically, reroutes itself, and simply refuses to hit obstacles in many situations. For beginners, this makes flying almost stress-free.
Honestly, this might currently be one of the best beginner-friendly selfie drones available.
2. Standard Camera Drone Mode
Connect it to your phone (via the DJI Fly app) or a DJI controller, and control it like a mini camera drone.
You get:
- Stable hovering and basic controls
- Smooth cinematic flight
- Up to several kilometers of range (with transceiver attached)
- Image quality comparable to entry-level DJI camera drones
This is the mode most casual users will rely on for travel and holiday footage.
3. FPV Mode (What We’re Really Here For)
To unlock FPV flying, you must attach the external O4 transceiver and use:
This modular approach works — but it’s also one of the drone’s biggest inconveniences. The add-on module requires separate purchase and installation, and isn’t quick to attach or remove.
Flying FPV with the Motion Controller
For absolute beginners, the motion controller is incredibly intuitive.
- You point → the drone goes there.
- Pull trigger → drone moves forward.
It feels almost like steering a flying camera rather than piloting an aircraft. My impression:
- Extremely easy to learn
- Obstacle avoidance actively protects you
- Smooth cinematic movement
- Surprisingly immersive with head tracking
You can even perform pre-programmed FPV tricks like flips and drifts with one button. Are they useful? Not really — mostly gimmicks — but beginners might find them fun initially.
Flying with the Motion controller is fun and easy to learn, but it does not teach real FPV skills. And once you master acro flying, you will probably never fly with a motion controller again because it feels very restrictive and limiting what you can do compared to true acro mode.
Using a Real FPV Controller
I highly recommend getting a FPV controller 3 and goggles 3 or N3 for the Neo 2 if you care about flight experience. They truly unlock the full flight performance of the Neo 2.
You get 3 flight modes:
- Normal Mode — stabilized, obstacle sensors active
- Sport Mode — just like Normal mode but faster, and turns off the sensors
- Manual Mode (Acro mode) — true FPV drone experience
Normal Mode
This is the beginner mode. Speed is relatively slow, the drone holds it position when you are not touching the sticks, and it actively prevents collisions even while flying backward — something most FPV drones cannot do. It feels like FPV with training wheels. For beginners, this is probably the safest FPV experience currently available.
Sport Mode
Max speed increases to roughly 40–50 km/h, and the drone feels more lively but still forgiving. It’s fun, stable, and confidence-building — a good stepping stone before manual flight.
Manual Mode (True FPV)
This is the ultimate mode you want to be in – it allows full manual FPV flying. But the Neo2 but is not a good acro FPV drone:
- Feels heavy and underpowered
- Slow acceleration and too much drag
- Floaty handling
- Limited control authority, not sharp or responsive enough
- Struggles in wind and easily pushed around
It can technically do flips rolls, dives — but not particularly well compared to real FPV drones. So while it can fly manual mode, it does not feel like a proper FPV ripper. It is more of a camera/selfie drone that happens to have manual mode, rather than a real freestyle FPV drone.
You can learn basic stick coordination, but once you push harder, the drone reaches its limits quickly.
Image Quality

Although the DJI Neo 2 still uses a 1/2″ image sensor—just like the original Neo—both image quality and field of view have seen a noticeable improvement.
Overall, video quality is very respectable, and considering the Neo 2’s compact size and sub-250g weight, it’s genuinely impressive. Low-light performance is better than the Neo 1, though the limitations of a small sensor quickly appear in the form of motion blur and visible pixelation.
Another big upgrade is the new 2-axis mechanical gimbal, replacing the single-axis tilt stabilization found on the original Neo. The result is sharper images with a wider field of view.
The Neo 2 records in 4K and 1080p at 60fps, 50fps, and 30fps, stored in MP4 with a maximum bitrate of 80Mbps.
There’s no D-Log M support and video is limited to 8-bit color which might be slightly disappointing for people serious about color grading. Low-light shooting also remains underwhelming due to the small sensor. But to be fair, anyone buying the Neo 2 likely values its compact size and ease of use over pure camera performance. For casual pilots, the image quality is more than adequate. In good lighting, the Neo 2’s video quality is perfectly suitable for social media content, travel clips, and casual filming.
DJI includes 49GB of onboard storage, enough for roughly 1 hour and 40 minutes of 4K/60fps footage. This should be sufficient for most casual users. However, since the Neo 2 does not support SD cards, longer recording sessions will require you to offload footage to a computer once the internal storage fills up.
Obstacle Avoidance Sensors

Neo 2 improved tracking and safety by adding LiDAR sensors and expanding coverage in all directions:
- Front-facing IR/depth sensors
- Top-mounted obstacle camera
- Downward positioning sensors
- Likely rear detection as well
Benefits include:
- More reliable object tracking
- Smarter Return-to-Home (less risk of collisions)
- Safer indoor flights
- Fewer unexpected crashes
The Neo 2 can detect obstacles from almost every angle, which is particularly useful when using tracking features, automated modes, or filming while sliding sideways or flying backward. DJI provides both visual indicators (yellow → red proximity warnings) and audible alerts as you approach an obstacle.
That said, obstacle avoidance isn’t foolproof. Like most small drones, the Neo 2 can occasionally miss small objects, such as tree branches, twigs, wires, or leaves. It’s absolutely helpful—but you shouldn’t rely on it blindly. Always stay aware of your surroundings.
One important note: In sport mode, obstacle avoidance is disabled, although basic obstacle detection remains active. This means the drone will warn you, but it will not stop itself—so fly carefully.
Flight Time: Shorter Than Advertized
The Neo 2 features a lightly larger battery (from 10.5Wh to 11.5Wh), DJI claims the flight time has been increased to around 19 minutes per pack — which should have been a noticeable improvement over the original’s 17 minutes. However, real-world tests show closer to 13 to 15 minutes of actual flight time once you factor in the added weight of the transceiver module.
The USB-C charging hub can fully charge up to 3 batteries simultaneously in under an hour (65W), considering the flight time, you’ll likely need to wait a little bit between flights for them to fully recharge.
And here’s another bad news — replacement batteries now cost almost double, jumping from $69 for the original Neo to $129 for the Neo 2.
Noise: Quieter Propellers, But Still Not Silent
The loud, high-pitched whine of the original Neo was one of the biggest complaints from users. The Neo 2 addresses this with redesigned propellers, bringing two improvements:
- Reduced overall noise
- Less harsh, lower-frequency sound
While the Neo 2 is not dramatically quieter, the sound signature is noticeably deeper and less piercing than the Neo 1. This makes it feel quieter and far less annoying. From roughly 100 meters away, the drone becomes surprisingly stealthy—you can barely hear it.
Backward Compatibility
The Neo 2 works with existing DJI FPV gear such as, just like the original Neo:
- Goggles 3
- Goggles N3
- DJI FPV Remote Controller 3
This means current Neo users can upgrade more affordably.

Control Methods and Range
The DJI Neo 2 offers a surprising number of ways to control it, depending on whether you’re flying casually, filming yourself, or using FPV gear. You can operate the drone in the following modes:
- Hand Gestures in automatic mode (no controller or goggles required)
- Smartphone-only control via Wi-Fi using the DJI Fly app
- DJI RC-N3 or DJI RC 2 + smartphone using the Digital Transmitter module
- DJI RC-N3 controller alone (no phone) using the Digital Transmitter module
- Full FPV mode using Goggles 3 + RC Motion Controller 3 or Remote Controller 3
The DJI Neo 2 ships as a WiFi-only drone, unless you purchase and install a special transceiver module at the rear of the drone, which enables OcuSync connectivity so you can pair it with existing DJI FPV gear such as the Goggles 3 and RC 3 controllers. This setup offers:
- Reduced control latency
- Extended range — easily over a mile (the real bottleneck will be the battery life)
Without this module, the Neo 2 can only be flown over short-range WiFi from your phone, or via hand gestures — meaning you can control and record with it completely without a remote. WiFi mode still promises up to 500m of range with a direction connection to a smartphone (without a controller) which is plenty for most casual users. If you want more range, using goggles with Ocusync O4 is the way to go, e.g. Goggles 3 and Goggles N3, but this would require the transceiver module.
The transceiver module is sold separately, and it’s also included in the Fly More Combo. Note that this module weighs nearly 10 grams, so you will lose some flight time using it.
Flight Performance: Not A Ripper
The DJI Neo 2 received a noticeable speed upgrade. Its top speed increases from 8 m/s on the original Neo to 12 m/s (roughly 45 km/h). That’s a meaningful improvement, but still slow compared to a similarly sized custom-built FPV drone, which can easily double that speed.
It’s important to understand that the Neo 2 is not designed for acrobatics, freestyle, or racing. While it can handle basic maneuvers and relaxed cruising, it struggles with anything resembling aggressive FPV flying. In particular:
- It has difficulty recovering from high dives
- It suffers from severe prop wash and yaw instability during abrupt inputs
- It may even crash when pushed beyond its limits
- Light weight + weak power system = poor performance in wind
These weaknesses largely come from its prioritization of flight time over output power, and the very lightweight battery system.
DJI added Manual mode in a firmware update after release. In Normal mode, the drone often feels like the stabilization system is fighting against your stick inputs, resulting in robotic, unnatural flight motion.
Manual mode offers a more natural feel and is highly recommended for experienced pilots, even though the Neo 2 still lacks the power and responsiveness required for true freestyle flying.
Like the original Neo and the Avata 2, the Neo 2 includes:
- Emergency brake (when using a compatible remote controller)
- Return to Home (RTH) when video or radio signal is lost, can be activated manually
Limitations
The Neo 2 uses a 2-axis gimbal, not a 3-axis one, so you may still notice some shakiness in very windy conditions. However, the built-in RockSteady digital stabilization does a good job of smoothing things out, and the footage still looks impressively stable for casual flying.
The drone also has a height limit of 120 meters — it won’t fly higher than that and will simply hover in place if you try to exceed it. This is much lower than the Avata 2’s 500-meter ceiling.
Unfortunately there’s no SD card slot, meaning you’ll need to rely on the 49GB of built-in storage for saving your videos. For most casual pilots, though, that’s plenty of space, but you should remember to download your footage after every session so you don’t have to delete unsaved footage the next time you fly it to free up space.
Is the DJI Neo 2 Good for Learning FPV?
Sort of.
Good for learning the basics of flying:
- Experiencing FPV for the first time safely
- Learning orientation and build confidence
Not ideal for:
- Learning real acro/freestyle flying due to the lack of power
- Not made for hard crashes
- Long-term FPV progression is limited
If your goal is freestyle flying, you’ll probably outgrow the Neo 2 quite quickly. But if you also want to use the Neo 2 as a selfie drone and camera drone, it’s a device that does everything reasonably well and highly versatile.
Neo 2 vs DJI Mini 5 Pro
Camera drones like the DJI Mini 5 Pro—and even the older Mini 4 Pro—are way better than the Neo 2 when it comes to image quality. They feature significantly larger image sensors, far superior image processing, and more reliable exposure and dynamic-range handling. Footage is sharper, cleaner, and overall much more professional. Their larger size and advanced gimbals also produce smoother, more stable flight footage.
That said, the Neo 2 has strengths that traditional camera drones don’t offer, such as:
- Excellent selfie and tracking modes
- Gesture control, allowing you to fly without a controller
- A very beginner-friendly flight experience
- The option to fly with FPV goggles for an immersive view
- A much lower price tag — around $200
Neo 2 vs Cinewhoops
Custom-built cinewhoops like the BetaFPV Pavo20 are on a completely different level when it comes to power, speed, and performance. With the DJI O4 Pro Air Unit, cinewhoops can capture far higher-quality video as well. For experienced FPV pilots, a cinewhoop is unquestionably the superior tool.
However, the Neo 2 offers unique advantages that cinewhoops simply don’t have, such as:
- Built-in tracking features
- Obstacle avoidance
- Selfie mode and automated shooting
- A much more accessible learning curve
- No soldering, no assembly, and no tuning required
Cinewhoops are faster, more precise, and more durable in crashes, and you can repair them yourself with inexpensive parts. In contrast, if you damage the Neo 2, you’ll probably need to rely on DJI Care and send it in, which costs both time and money.
Still, for non-FPV users or beginners who prioritize ease of use and safety over performance, the Neo 2 can make more sense.
How to Fly in Acro Mode?
To fly the Neo 2 in acro mode, you need extra accessories. The drone alone is not enough. You need:
- the transmission module (extra $30+)
- DJI Goggles 3 or Goggles N3
- the FPV Controller 3 remote controller
What’s acro mode and why I recommend it over self-level flight modes: https://oscarliang.com/acro-angle-horizon-modes/
You also need to change a few settings:
- assign the M button on the controller to Manual mode in the settings
- turn self-leveling off in manual mode
- increase the rates (e.g. to around 700 deg/s or higher), because the default rates are too slow for proper flips and rolls and you might lose too much altitude during flips
Best Camera Settings
Automatic settings work fine for some people and in most situations, but videos don’t always look the best if that’s what you want to achieve. To achieve cinematic looking footage, you should set your camera parameters manually.
Frame Rate
I usually use 60fps, playback looks smoother on Youtube.
Shutter Speed
For shutter speed it depends on your frame rate:
- for 30fps, use 1/60s
- for 60fps, use 1/120s
Why? This is using the 180-degree rule as explained in our ND filter tutorial: https://oscarliang.com/nd-filter-fpv/#The-180-Degree-Rule.
This is important because it gives you the right amount of motion blur, which makes footage look smoother and more cinematic. If shutter speed is too high, such as 1/500 or 1/1000, the footage starts to look jittery and video-game-like.
However, to use 1/120 shutter speed with 60fps in daylight often overexposes the image, so ND filters are essential. They act like sunglasses for the camera, reducing light so you can keep shutter speed low enough for cinematic motion blur.
Recommended ND filter choices:
- ND4 for overcast/cloudy days
- ND8 for light sun or partial cloud
- ND16 for bright daylight
- ND32 to ND64 for harsh midday or summer sun
Recommended Settings
- 60fps
- 1/120 shutter
- ISO 100 to avoid exposure jumping
- choose the ND filter based on lighting
Other Camera Settings
I also recommend recording in 4:3 aspect ratio and turning in-camera stabilization off, then using Gyroflow for stabilization in post. The reason is that Gyroflow gives smoother results and more flexibility.
Keep sharpness low or neutral (e.g. -2), and use minimal noise reduction (e.g. -1).
Final Thoughts
The DJI Neo 2 is positioned as a beginner-friendly drone, and it succeeds in many ways — but it’s also held back by some fundamental limitations. The heavy frame that prioritizes safety over efficiency. The modest motors and Li-ion batteries prioritize flight time over raw power. As a result, the Neo 2 never truly feels like a “real” FPV quad. Image quality is improved but still lags behind dedicated camera drones.
Let’s be honest: the Neo 2 isn’t never meant to be a pure FPV drone — it’s a selfie drone with FPV elements. But that doesn’t mean it’s without appeal. You can’t ignore its strengths:
- AI tracking and gesture control
- Obstacle avoidance for safer flying
- Extremely easy setup — no soldering, no tuning, no configuration
- Ready-to-fly convenience that beginners will love
The Neo 2 clearly targets a specific group of users: beginners who don’t want to build or configure a drone, and casual pilots who value intelligent flight features over raw performance.
Get the Neo 2 from
For hardcore FPV pilots, the Neo 2 might feel a bit underwhelming. But for casual flyers who simply want a compact drone that’s easy to operate, shoots decent video, and adds safety features like obstacle avoidance, the Neo 2 is worth considering. But if you prioritize image quality, the Avata 2 is still better with it’s 1″ camera sensor. It also flies better and longer thanks to the more efficient power system and bigger battery. See my review here: https://oscarliang.com/dji-avata-2/. The higher height limits also makes it more suitable for more serious flying.
If you are a beginner looking for good value bundles, check out my buyer’s guide: https://oscarliang.com/beginner-fpv-drone-bundles/
Edit History
- Oct 2025 – Review published
- Jun 2026 – Updated with info on the best settings and how to fly acro mode